The ladies at our church have a banquet, usually once a year, called a "hospitality banquet." People decorate tables in a theme of their choosing and invite friends to come to the banquet. We eat a great meal and always have a great speaker. About a month ago, my youngest daughter said, "Mom, I think you need to do a table for the banquet." I of course replied, "What? That's not my thing. I'm not a decorator." Then she convinced me by saying, "Sure, you can do a scrapbooking table, and I will help you." I wouldn't commit to it at that time, but the more I thought about it, the more ideas that kept coming to my mind. So, I decided to do it and came up with a plan. First of all, since it was supposed to be a scrapbooking table, I had to come up with a way to "scrapbook" something on the table. That's when I decided that I had two shadow box frames already and that I could put something in them. Then I thought about doing "Faith, Hope and Love" as my theme. So, I bought a third frame, and the work began. I cannot begin to tell you how many hours I spent making all of the "stuff" for this table, but it was a complete labor of love! Hopefully, someone was blessed by it. (And it won the "Martha Stewart" award at the banquet -- how fun!)
Here is a picture of my "Faith" frame.
I made this design using my Cricut, some Prima and Bazzill flowers, lace, and my Spellbinders Nestabilities. The frame is an 8" x 10" frame, and the word "Faith" was cut using the Home Accents solutions cartridge. The cross was cut from the Indie Art solutions cartridge. I put it on a Nestabilities scalloped circle. I ran the word "Faith" through my Cuttlebug and embossed it.
Here is a picture of my "Hope" frame:
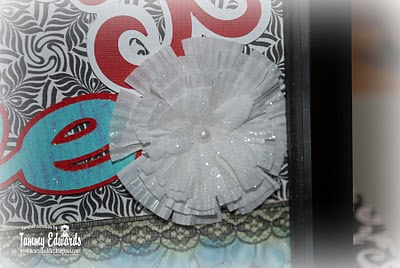
Since I didn't have a Cricut cartridge with the word Hope on it, I used Sure Cuts a Lot and designed the word and welded it. I do not remember the font, but if you are interested, email me or leave a comment, and I can figure it out. After I cut the word, I ran it through my crimper to give it dimension. I also used some Prima lace with flowers attached to it that was given to me by a dear friend for my birthday last year. The bird was cut from the Straight from the Nest Cricut cartridge. This is the frame to which I added my cupcake liner flower that I showed you last week.
The last frame is my "Love" frame:
This was my favorite frame. I cut the word "Love" from the Sweethearts Cricut cartridge. The heart came from the Straight from the Nest cartridge. The Bible verse is on a Nestabilities label. The cross is a Spellbinders die. The fancy corner is also from the Sweethearts cartridge. The white flower was made using punches.
Now onto a few of the other table decorations:
Here is one of the six candles that I placed on the table. I tied a ribbon around them and added a flower made from punches, plus a little rose in the middle. I ran the flower through the crimper to give it texture.
Here is a picture of the candy bars we gave as favors. We covered them in paper and added a quick punched flower:
This is the goody bag we gave with cards made by my daughter, a gift tag, and a bookmark (pictures and instructions for this on another day):
Next, we have a picture of the flowers I made for the napkin rings (instructions on this flower will come another day as well). I loved making these flowers from cardstock and will make more of them:
And this is one of the placecards I used. It was very simple, with a name printed from my computer and a punched doily flower and center:
Here is a picture of our glasses, with black ribbon and a little charm tied on. It may be hard to see the angel charm:
And here is a picture of some of the carnations and rolled roses that I made to sit at the corners. The carnation is the one I showed in a post last week:
Now to a picture of my true labor of love -- a flat rolled rose topiary made from felt flowers! While surfing the internet for ideas, I found the tutorial and pictures, which you can find
here. I loved it! I did mine a little differently though. I added a pearl in the center of each rose and then painted Stickles glitter glue on the flowers. I started out making regular rolled roses, but they were pretty small, and then I realized that I was doing them backwards from the photos on the tutorial, and I really liked them flat. So, here are a couple of pictures of the topiary:
And finally, here are pictures of the table. We used my daughter's red polka dotted square plates and put them on red chargers. We used a white tablecloth and a black overlay. We had blue fabric covering a small box and then a damask hat box that I got for $4.50 (50% off) at Hobby Lobby -- woo hoo -- sitting on top of the fabric. The frames and topiary sat on top of the hat box.
And another picture:
You can click on the pictures to see them better. Thank you in advance for any comments! If you have questions about anything, just let me know.


